The choice of the method of storing vegetables and greens never loses its relevance, since after harvesting every housewife wants to preserve its useful properties for as long as possible. In this article, attention is paid to dill, since not everyone likes it in dried form. How long can it be stored and what can be done to keep it fresh longer - read more about this below.
How to prepare dill for storage at home
The procurement of any product requires the implementation of several preparatory measures, primarily including cleaning. As for the picked dill, the sequence of actions should be as follows:
- To begin, place the greens in the refrigerator in its original form (dirty).
- After 3-4 hours, remove it and remove any damaged and rotted shoots that are not suitable for further storage.
- If you plan to freeze or dry the dill branches, be sure to thoroughly rinse all the green mass and place it in cold water for 10-15 minutes before laying it directly.
 The washed and selected greens must be laid out on a dry and clean towel, leaving it until it completely dries naturally. After this, the branches of dill will be completely ready for further processing.
Important! If the plant is in store packaging (this applies not only to dill, but also to parsley or green onions), then after delivery it must be removed, otherwise the branches will rot much faster.
Terms and conditions of storage
You can keep dill fresh, but without freezing it does not lie as long as we would like. The exact numbers in this case depend on the particular method chosen:
| Storage method | Shelf life |
| In a glass of water (at room conditions) | Not more than 3-5 days |
| Refrigerated in a plastic container | Week 1 |
| In a jar of water (in the refrigerator) | 1-2 weeks |
| In a plastic bag on the bottom shelf of the refrigerator | 1-2 months |
| In the freezer | 6-12 months |
Problems with dill storage for up to two months usually do not arise, but then you will either have to dry the green twigs, or freeze them in the freezer. Simply put: the shelf life directly depends on what temperature you will keep the plant at.
How to keep dill for the winter
Not only the shelf life of useful and nutritious properties, but also the taste qualities that you should definitely pay attention to when creating certain dishes depends on the chosen method of storing seeds and the green part of dill. In some cases, fragrant dried herbs are more suitable, in others it is worth paying attention to the freshness of a thawed product. Because of this, it is worth exploring a step-by-step algorithm of actions for each possible storage option.
In dried form
If you need to keep greens for a long time without freezing, then the first thing that comes to mind is its drying. The simplicity and accessibility of the process itself makes it very popular among the hostesses, and if the required sequence of actions is observed, no problems should arise. At the initial stage, after rejecting unsuitable branches and cleaning the selected parts, it is important to determine how you will dry the plant: whole branches or finely chopped parts. All further actions depend on this (in the latter case, you will first have to cut the greens and only then send it for drying).
There are also many drying options:
- on the street under gauze (preferably under a canopy);
- in the microwave;
- in an oven or special dryer at a temperature not exceeding + 60 ° C.
Harvesting dill seeds for planting next year or for culinary use begins only when they change color and begin to rustle. Umbrellas need to be carefully cut from the bush and laid out on a clean surface so that they dry out a little more. In comparison with the green part of the plant, it is better not to use technical devices when drying the seeds, since they may well burn the seed and it will lose all ability to germinate.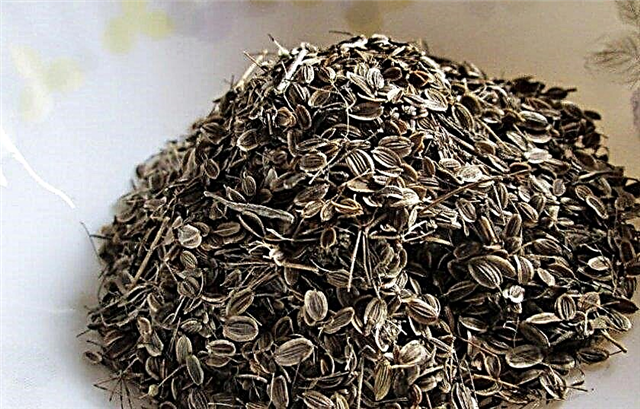 The rest of the drying process does not differ from similar actions to dry the green mass: after cleaning and placing on a pallet in a well-ventilated place, all future planting material should be poured into a glass container (or cloth bag) and kept in a dry and warm room until next year . This also applies to ground seeds, which will be used in cooking.
Did you know? Dill is popularly called by people with the very different names “smoker”, “coper”, “crop” and even “dac”, but in fact all these are different names of one useful plant, used not only in cooking and medicine, but also in the production of distillery products.
Frozen
Dill freezing is the most popular method of harvesting, which, with a minimum of physical effort, provides a large amount of always fresh greens that can be stored much longer than harvestings prepared by other methods. The sequence of all actions in this case is as follows:
- Cut petioles from prepared and peeled dill branches.
- If necessary, finely chop the twigs and spread the dill on a pallet for quick freezing (if you do not plan to grind the plant, you can lay out whole twigs).
- After the greens freeze well, transfer it to portioned containers (it is most convenient to use plastic bags with zippers) and store them for further storage in the lower compartments of the freezer.
 If desired, you can freeze other herbs along with dill - then at the exit you will get a ready-made portioned mixture for the first and second dishes, which will only facilitate the process of their preparation.
Important! Before placing in the freezer, it is necessary to thoroughly dry the whole dill, because if there is moisture on it, individual parts will stick together into one common lump. It is advisable to defrost the workpiece as rarely as possible, otherwise the greens will quickly lose a significant part of their nutritional properties.
In the refrigerator, in the compartment for vegetables
Storage of chopped dill in a regular vegetable compartment is suitable for cases where the plants are few and you plan to use it in the very near future. Often on the lower shelf dill is in high season and can remain there for at least two months after harvest. At the same time, in a month it will be possible to notice a partial withering of the branches, and after a few weeks they will begin to dry, losing all attractiveness. As before placement in the freezer compartment, the plant needs to be washed well, dried, and only then transferred to separate plastic bags or small plastic containers. Alternatively, you can add dill into a container with water, but to prevent it from moldy, you will have to periodically change it. When storing the culture in this way, it retains its elasticity longer and looks as if it had just been cut from the garden bed.
Useful Tips
Any of the described methods for harvesting dill is not very complicated and is suitable even for those who are not used to drying or freezing greens for the winter. True, even in this simple business there are several nuances, the knowledge of which will help to simplify the task as much as possible and eliminate the likelihood of losing a large amount of nutrients or quickly wilting the green part of the dill.
In this case, the following warnings should be considered:
- you can not leave cut dill branches in direct sunlight, the effect of which adversely affects the color saturation of the plant and contributes to its rapid drying;
- when freezing dill, always carefully dry the branches, and if you decide to put the plant in the vegetable compartment - use plastic bags that preserve the natural aroma;
- the seeds of the plant should preferably be kept away from other spices or food preparations that can absorb their strong odor;
- Dill umbrellas can also be dried in glass containers, where they will remain for further storage;
- if possible, avoid secondary freezing of dill, and if this still happens, make sure that during the second procedure all branches are dry and not stick together in one lump.
Whatever way you decide to prepare dill, in any case, with its help you can provide yourself with healthy greens for a long time. The main thing is to timely check the condition of the workpiece and prevent its overmoistening or, especially, decay.Did you know? An ordinary onion will help to preserve greens for a long time. It is not difficult to prepare such a blank, and all that is required of you is to place half of the cut fruit in a closed container with dill branches.

