Tomatoes are grown not only as a vegetable crop, but also as a decorative one. Agrofirm "Siberian Garden" recently introduced a new hybrid Strawberry tree, characterized by high decorativeness, good yield and many other benefits. About its features, as well as the rules of cultivation at home will be discussed below.
Grade description
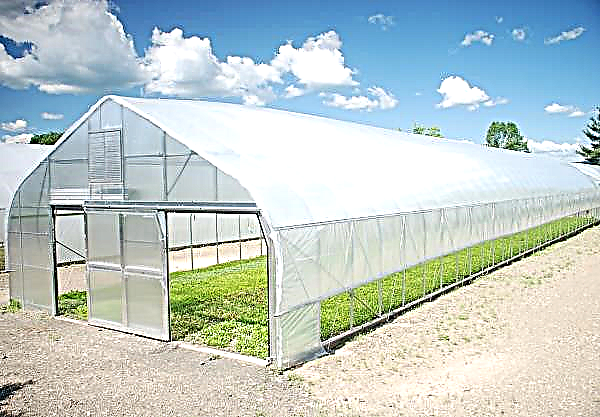
The variety was bred in 2013. Its name is due to the shape of the fruit, reminiscent of strawberries. The bush itself is similar in structure to a tree. For the most part they grow it in greenhouses, although the plants feel good in the open ground and give a good harvest. Due to its high decorativeness, Strawberry tree is often used in the phytodesign of the interior of apartments.
Did you know? The oil ester extracted from tomatoes is used in cosmetics as a stabilizer and preservative for other components.
Plants tolerate temperature extremes. With proper care, the yield per m² is 12 kg. The culture shows high resistance to verticillosis and tobacco mosaic. Unpretentious to the composition of the soil, which makes it possible to grow it even on the windowsill with a very small area of nutrition.
The variety is medium early. Fruits ripen in 110–115 days. Bushes are quite large in size. Their height can reach 2 m, with home cultivation - 120-150 cm. Up to 6 fruitful brushes are formed on the plant, in each of which up to 7 red fruits are tied. The mass of the fetus varies from 200–250 g. Inside there are 4–6 chambers. The pulp is fleshy, juicy, exudes a pleasant smell and has an interesting piquant taste.

Advantages and disadvantages
To optimize plant care, you need to know their strengths and weaknesses.
- Advantages of Strawberry Tree Tomatoes:
- high decorativeness of bushes and fruits;
- resistance to solanaceous diseases;
- good yield;
- high commercial quality of fruits;
- resistance to temperature differences, which allows cultivating the variety in cold regions;
- unpretentiousness to the soil composition.
- Disadvantages of culture:
- drought intolerance;
- the need for garter bushes due to their large size.
Sowing seeds for seedlings
The variety is grown by seedling.
Optimal timing
Sowing of seeds is carried out in mid-March. For cultivation in an apartment, you can sow at any time of the year, as well as for heated greenhouses.
Did you know? Regular consumption of tomatoes in the summer allows you to protect yourself from the negative effects of UV radiation. Due to the presence of lycopene in the composition, the fruits inhibit the development of cancer cells.
Soil mix
Soil mix for seedlings should be water-absorbing and well-drained.
To achieve this quality, you need to mix in equal proportions:
- peat;
- sand;
- compost.
To increase the nutritional value and disinfection, wood ash is added to this composition - 20% of the total mass of the finished mixture.
Capacity for growing
As containers for seedlings, you can choose one of several options:
- general plastic containers;
- peat tablets and pots;
- disposable cups.
At the initial stage of seed germination, it is better to prefer common containers or peat tablets. This will make it possible to reduce the growth rate of the terrestrial part of plants, and seedlings will not outgrow. When planting, you just need to slightly deepen the plants into the ground. It is better to dive seedlings into peat pots of a suitable volume (focus on the size of the root). This method will accelerate the adaptation of plants to a new place at the time of the final transplant, as they will move into the soil with pots, which after decomposition will become a good feed for the soil.
Seed preparation
Planting material should first be checked for germination. To do this, the seeds are placed in saline for half an hour - 1 teaspoon is added to a glass of warm (+ 30 ° C) water. salt. Surfaced specimens are weeded out, and those settled to the bottom are transferred to the Epina solution.
It is a growth promoter that also has a disinfectant effect. 2 drops of concentrate are added to 100 ml of water and seeds are placed in it for 4 hours. The temperature of the water for the preparation of the solution should be + 20 ° C. The same drug can be used later as a top dressing for seedlings.
Sowing seeds
Preliminarily, 1 cm layer of expanded clay is placed in the general containers at the bottom. Before laying in the pot, the soil is poured with warm (+ 30 ° C) water so that its moisture content is 60%.
In general containers, seeds are sown in furrows 1 cm deep. Planting material is placed at a distance of 7 cm. A distance of 10 cm is maintained between furrows. Seeds are covered with a layer of sand. After that, glass is laid on the surface of the container or a cling film is wound.
During the germination period of seeds in the room maintain a temperature of + 27 ° C. At this stage, care consists of daily fifteen-minute airing and control of soil moisture.Important! If mold appears on the surface of the soil during the germination period, immediately remove a thin layer of it along with harmful microorganisms and replace it with a mixture of sand and wood ash.
Seedling Care
With the advent of the first shoots, shelter is removed from the pot. The seedlings are rearranged on a well-lit window sill, and the air temperature is gradually reduced to +18 ... + 20 ° С. Humidity is maintained within 75%, soils - 50%. For the full development of seedlings, plentiful lighting is necessary. The optimal daylight hours are 12 hours. If the weather is cloudy, then you should take care of additional illumination with luminescent or phytolamps, which should be installed above the plants.
Watering is carried out from the spray gun with water at room temperature as the top soil layer dries to a depth of 1 cm. With the appearance of 2 full leaves, you can carry out the first top dressing with Epin. 5 drops of the drug are added to 200 ml of water. The solution is sprayed on the sheet and on the surface of the soil.
With the disclosure of the third leaf, pickling of seedlings is carried out in separate containers. The soil is prepared in a similar way. Plants are watered abundantly per day, and then carefully removed from the total capacity. The stem is buried in the soil by 1-2 cm. After 10 days after transplanting, fertilizing with Epina solution is carried out on a sheet. The last top dressing is carried out 10 days before disembarkation at a constant place. At this stage, a urea solution is used. 5 g of substance are added to 1 liter of water. The solution is made by spraying on the sheet and soil.
Seedling hardening
2 weeks before landing on a permanent place, you need to conduct the hardening procedure. It is necessary to increase the adaptive abilities of plants. At first, the air temperature in the room begins to gradually decrease to a similar outdoor temperature.
Once the goal is achieved, the plants are exposed for several hours in the afternoon to open air or to a non-glazed balcony. Gradually, the time interval for staying in the open air is increased to 12 hours. Then they begin to leave seedlings on the street at night. The day before the transplant, the seedlings must be put up for 24 hours directly in the containers at a constant place of growth.
Planting seedlings in a permanent place
Landing area is prepared in 2 stages in the fall and spring.
Autumn preparation consists of the following activities:
- harvesting crop residues;
- cultivation to a depth of 30 cm;
- the introduction of 1% solution of copper sulfate;
- after a week, the application of 10 kg of manure and sand for each m²;
- cultivation to a depth of 20 cm.
Important! In the fall, after cultivation, the soil is not leveled. This allows you to enrich it with oxygen.
Soil preparation in the spring:
- cultivation to a depth of 30 cm;
- application of 10 kg of compost and 400 g of wood ash for each m²;
- cultivation to a depth of 20 cm with subsequent leveling of the territory;
- 10 days before planting, watering the soil with Fitosporin solution - 5 g of powder per 10 l of water for each m².
Seedlings at the age of 2 months are planted on a permanent place on May 10-15. The optimal planting scheme is 2-3 bushes per m². Wells of 20 cm deep, 15 cm in diameter are formed on the site. A pitch of 40 cm is maintained between the wells, 60 cm between rows. The top soil layer from the hole is mixed 1: 2 with a sand-peat mixture and 1 liter of warm water is poured into the hole.
Soil mixture is filled into the well by 1/3, then plants are transferred to it in peat pots. If the seedlings are planted in plastic glasses, it is removed along with an earthen lump. Filling the voids, the soil around the stem is slightly compacted, sprayed from the spray gun and covered with compost.
Outdoor Care
In the future, special attention should be paid to watering. The culture is very demanding on moisture, so it is best to organize a drip or ditch irrigation system. Such systems involve the removal of water-supplying devices directly to the root system of each plant, which reduces the risk of moisture entering the ground part and, accordingly, eliminates the risks of stem rot development.
Top dressing is applied only 3 times:
- 10 days after transplanting into open ground - apply a liquid solution of mullein mixed with water 1: 2 (300 ml per plant);
- with the first buds - use a solution of wood ash of 10 l per m², add 300 g of ash to this amount of water;
- after flowering with the first ovary a solution with yeast is used, a pack of yeast + 1 tbsp is added to 10 liters of water. sugar (this amount is enough for spraying on the sheet and soil per m²).
Loosening of the soil is carried out once every 10 days with passing weeding.
Garter is a must. To do this, you can use separate stakes driven in next to each plant. But it is better to build horizontal trellises. For their construction, stakes are installed at a distance of 40 cm from each other over the entire length of the rows. Between the stakes pull 3 rows of rope. The bottom rope should be at a height of 25 cm from the soil surface. As the plants grow, branches are horizontally fixed on the trellises in tiers.

Features of growing on the balcony
When growing the tomato variety in question on the balcony, you need to provide high-quality lighting for 12 hours. In mid-May, seedlings are transplanted into 5 liter pots. In the pots, special plastic stairs are necessarily installed, to which plants are tied.
Watering is carried out every 3 days. To introduce moisture at a distance of 10 cm from the stem, a circle 2 cm deep is formed. On each plant, an average of 1-2 liters of water is consumed, depending on age.
Top dressing is applied according to the scheme presented for open ground. Only slurry is better to replace compost. Compost is diluted with water 1: 1.
Important! After top dressing on the sheet, you need to make sure that the liquid does not stagnate in the leaf sinuses. If there is water in them, it should be removed with a dry cotton swab.
Grade Diseases and Pests
Of the diseases, the variety in question is often exposed brown spotting. The disease begins to progress with insufficient lighting and non-compliance with the humidity regime. When the first symptoms appear, the affected parts of the plants must be cut off. Surface treatment with wood ash. After 3 days, spray with garlic solution. To 100 ml of water add the juice of 2 medium cloves of garlic.
Among pests, the greatest damage to the Strawberry tree is spider mite and whitefly. You can cope with them by collecting manually, followed by dusting the plants and soil with tobacco dust.
Tomato variety Strawberry tree shows good yield even in adverse growing conditions. It can be cultivated as an ornamental plant on the balcony and in the apartment.

