A sign of this summer cottage is not only a summer house, garden and flowerbed, but also a cozy gazebo where you can relax after tiring garden work. Not every homeowner can afford to hire professional specialists in the field of landscape design for the design and construction of such a structure, so many people think about how to solve the problem on their own and, preferably, from improvised means or at least not very expensive materials. About all the intricacies of building a simple gazebo for a small summer cottage - below in the review.
Arbor Options
Among the huge number of existing options for gazebos, we can distinguish two of their main groups - open and closed. In the first case, the structure does not glass and consists only of a frame with a foundation and a roof, in the second it is a more complete structure, where you can relax not only in summer, but also in the off-season, without being dependent on air temperature, precipitation or wind.

If you plan to build a gazebo with your own hands, it is better to stay at the open version as a simpler one. In addition, in addition to glazing, closed pavilions are usually supplied with a separate water supply system, and sometimes with independent heating, which is expensive, difficult, and generally not necessary for ordinary summer cottages.
Among the main building material used for construction, the most popular are:
- wood (boards or timber);
- brick;
- natural or artificial stone;
- metal (professional sheet, corner, etc.);
- building blocks;
- plastic (profile pipes, polycarbonate, etc.);
- forging (very beautiful, but one of the most expensive options).
Did you know? There is a version that the first arbors were invented by the ancient Egyptians more than 5000 years ago. On the tombs of the majestic pharaohs, open buildings are depicted, inside which the rulers could escape from the merciless African sun.
Less commonly, more exotic materials such as plastic bottles are used to build pavilions. If you have the imagination and the ability to correctly use literally everything that is at hand, you can create a very light and beautiful structure from planted in a certain order of climbing or bending plants, shrubs, small trees and other perennials.
 The so-called living arbors are a whole direction in landscape design that cannot leave anyone indifferent. The disadvantage of such tents is that their final formation sometimes has to wait for years. In addition, under the canopy of dense greenery it is too dark, but at the same time such a cover protects against rain very conditionally.
Another popular type of open pavilion in the country is the barbecue gazebo. Its peculiarity is that inside the structure, in addition to the usual table and benches, there is a barbecue (oven with a chimney) for cooking meat on the grill or other dishes “outdoor food” that are relevant - pilaf, fish soup, shurpa, etc.
Various forms of arbor can also be. In addition to a standard rectangle or square, the structure can be made round, oval or hexagonal. More complex forms also occur, but for home construction in the country it is not advisable to choose this option: firstly, in this case there is a higher probability of failure due to an error in the project or its implementation, and secondly, bulky and pretentious buildings in small areas look out of place and tasteless.
Important! The simpler the form of the gazebo conceived, the higher the likelihood that the structure will be reliable and stable. The uniqueness, sophistication and beauty of the finished pavilion can be given through subsequent competent decoration.
A few words need to be said about the size. Of course, there are no strict rules here, however, during construction, at least two factors must be taken into account exactly - the total area of the site (and the free space on it), as well as the approximate number of family members or guests who are planned to be placed inside.
Experts recommend focusing on the following rules:
| Gazebo capacity | Optimal sizes, m |
| 2 people (no table, only a bench) | 2×2 |
| 3-4 people | 2×3 |
| 4-6 people | 3×3 |
| 4 people and a small barbecue | 3×5 |
| 6 people and barbecue | 3×6 |
| 10-15 people | 4×4 |
| More than 20 people | 5×5, 6×6, 5×7, 6×7 |
According to the generally accepted classification, small pavilions include pavilions whose internal area does not exceed 10 m² (2 × 2 m, 2 × 3 m or 2 × 4 m).
Style selection
In addition to the type, form and basic material for construction, before the construction of a summer house, it is worth deciding what style it is made in. In addition to your own preferences and examples seen in magazines, on television or on the Internet, it is important to focus on the general layout of the site, since in most cases it is it that sets the direction and suggests the right choice.
Did you know? One of the most unusual pavilions was built in the 50s by British architect Patrick Michel for a creative customer who wants to combine a pavilion for relaxation with a study. The construction takes the form of a bizarre curl and consists of an enclosed space and a canopy where garden equipment is stored, which is called “the shoffice” (the prefix from the English “shovel” (shovel) is added to the well-known word “office”).
For example, the oriental or Moorish style in landscape design involves a huge amount of diverse exotic greenery and the obligatory presence of an open source of water nearby - an artificial pond, waterfall, stream or fountain.
The gazebo with a roof in the form of a dome, decorated with weightless curtains made of natural silk, and inside covered with carpets and pillows, fits perfectly into such surroundings, but in the middle of the beds with parsley and potatoes it will look like an alien and ridiculous object. There are more than 130 different styles for decorating a summer cottage, and each of them dictates certain requirements for a gazebo.

The volume of this article does not allow to dwell on everyone, and this is not necessary, it is enough to list only the most common ones:
| Style | Main features | Gazebo |
| English (classic) | Strictness, conservatism, practicality, the presence of a lawn is mandatory. | Spacious enough, only from natural materials, with a solid foundation, rectangular or hexagonal. |
| Country (rustic) | Ease, negligence, the presence of a garden and a large number of diverse equipment. | Wicker or log, with heavy wooden benches, without any curtains or other decorations. |
| Provence | Simplicity, straightforwardness, sentimentality, pastel colors. | Small, decorated with dry or fresh flowers, you can put old furniture inside. |
| Japanese garden | Asymmetry, elegance and airiness, but at the same time solidity. A lot of water, stones, moss. | Square, with a characteristic raised roof. The ideal material is bamboo, but wood is also suitable. |
| Eco | Minimal human intervention in the natural landscape. | Live gazebo is best suited to this style. |
| Scandinavian | Alpine hills, pines, mown lawns. | Strict and natural material, rectangular or square, with a sloping roof. |
| Boho (gypsy) | Luxury, pretentiousness, an abundance of colors, gilding and brass. | The basis can be any, the main thing is a lot of decorations, curtains and carpets. |
| Loft | “Industrial fabrication”, emphasized rudeness and lack of processing, gloom and dullness. | Of metal pipes or bricks, with bare walls. |
Necessary materials and tools
Depending on the chosen variant of the gazebo, a different tool may be required, however, in any case, you will need:
- wood hacksaw;
- circular power saw (preferably);
- tape measure, square, level, other measuring tool;
- drill (screwdriver) with a set of drill bits for wood, wood screws;
- hammer, nails, awl;
- ruberoid, stucco mesh;
- a concrete mixer (preferably) or a trough for mixing concrete;
- soil drill;
- building stretcher or trolley;
- shovels (separately for earth and concrete).
Before starting construction, it is necessary to stock up on several pairs of work gloves of different stiffness - knitted, rubber, cotton, preferably with a PVC coating, fleece, etc. Depending on the type of work, they can be changed.

The same goes for materials. If after building a house, a summer kitchen or other outbuildings there is an excess of sand, cement, gravel, reinforcement, nails, plywood, boards, roofing material or slate - all this can perfectly go into business, and the missing components will just need to be bought.
Phased construction
The construction of a compact and small gazebo on your own summer cottage is not an overly complicated task. Perform it under the power of any enthusiast. Even before the start of construction, you should clearly imagine the main stages of the work, so that to calculate their complexity, duration, need for certain materials, assistants, etc. This will make it possible to rationally manage the time, not to spend unnecessary efforts, and also, if possible, to adapt to weather conditions and organize work so that it does not have to work in heavy rain, in frost, wind or mud.
Site preparation
All things being equal, for the construction of the gazebo, you should choose a place in the elevated part of the site with a minimum slope. In any case, before starting the foundation, the selected site must be aligned in a horizontal plane. For this purpose, part of the fertile layer of the earth is removed to a depth of 15–20 cm from an area exceeding the dimensions of the future arbor by 40–50 cm in each direction. For example, if you plan to build a 3 by 4 m arbor, then you should align the surface by 4 by 5 m.

The fertile soil that is released from under the future gazebo, you must immediately move to those places in the summer cottage where it is really needed - under fruit trees, in beds or flower beds. In addition, due to this land, it is possible to solve the problem of slope in such zones by adding an additional layer to the lower point and leveling the surface so that the irrigation water is distributed evenly on the garden bed and does not go in one direction, taking with it the black earth layer.
Foundation
The larger the structure, which is planned to be erected, and the heavier materials will be used in this case, the more powerful the foundation should be. In the vast majority of cases, for small structures made of wood with a light roof and the absence of glazing, there is no need for a strip foundation, especially a continuous screed.
 A - tape; B - monolithic; In - columnar; G - pile.
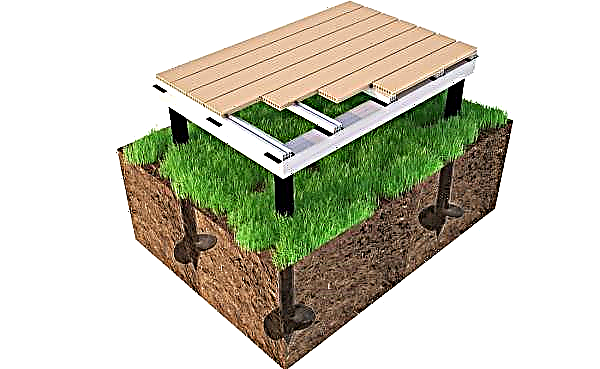
Foundation blocks or columnar foundations are quite acceptable, as they are more economical in terms of material consumption and labor costs. The number of foundation columns is determined by the number of load bearing vertical columns of the gazebo according to the design (each column of the foundation is placed under the corresponding supporting column).
It should be assumed that the foundation posts must be buried in the soil by at least 30 cm. To obtain the necessary recesses in the soil under the future foundation support, you can use a special drill with a diameter of 20-30 cm.
Important! The higher the depth of winter freezing of the soil, the greater the deepening of the columns must be ensured. Fulfillment of this requirement will prevent seasonal “pushing out” of the foundation supports.
Holes should be drilled to a depth exceeding the depth of the foundation column by 10-15 cm. In the case of a summerhouse, this is approximately 45 cm (30 + 15). As a formwork for future columns, you can use asbestos pipes of the appropriate diameter, and for lack of such, you can make it yourself from a stucco mesh and roofing material. This is done as follows: the plaster mesh is folded into a pipe of the desired diameter and length of 2-3 layers, fixed in several places with wire to maintain dimensions, and then wrapped with two layers of roofing material.

The length of the formwork is such that, after installing it in the drilled hole and pouring concrete, the column rises 5 cm above the ground surface (before removing fertile soil). For the dimensions under consideration, this length should be 45 + 15 + 5 = 75 cm. So that the surface of all columns is located in one horizontal plane, the horizon is preliminarily determined using the level and the cord.
The installation of the prepared formwork pipes and the filling of the columns is carried out in the following order:
- The formwork is inserted into the prepared holes and 10 cm is covered with crushed stone as drainage.
- Concrete is poured (tamped) to the required level.
A hairpin or other metal mortgage can be deepened into the top of each column to simplify the subsequent installation of the wooden base of the gazebo.
Bottom harness
After the foundation has dried, you can begin to install the so-called lower harness. It is important to keep in mind that it is usually made of the same material as the upper harness, as well as side load-bearing racks. The most suitable material for this is a square beam with a cross section of 10 cm.
The boards of the lower harness must be fixed to each other using the appropriate metal corners or "half board". From the point of view of the general geometry of the future gazebo, the lower harness is a determining element and should be performed as accurately and accurately as possible. At this stage, you can still correct the height errors of the installed foundation supports.
 In places of contact with the concrete base, several layers of roofing material should be laid as a waterproofing, and the boards themselves should be treated with a special composition that prevents the growth of the fungus and the destruction of wood from moisture. Additional fastening to mortgages will give the gazebo increased resistance to wind loads.
Rack Installation and Upper Trim
Vertical racks are installed end-to-end on the bars of the lower harness and are attached to them using metal corners. During installation, each stand is set vertically with the help of a level and is temporarily fixed in this position by corner strips in two planes.
 After this, the racks finally "sit" on the corners with wood screws.
Next, the upper harness is assembled. It can be made in the same way as the lower one - “in the plane”, or you can cut individual bars between the posts and immediately mount them on the corners, aligning with the height. The second method is easier if there is finely cut material. Racks with lower and upper harnesses form the finished frame of the structure.
 At this stage, it is possible to dismantle the temporary fixation with angular trims.
Floor
Before laying the floor, the remains of unusable soil contaminated as a result of concrete work, clay after drilling, as well as any construction debris (except organic matter) can be folded and leveled under the finished frame. After that, the previously prepared place for the arbor should be covered with drainage (gravel or screening) so that 5-10 cm air gap remains under the lower harness.
In this case, not only a board can be used as a floor covering (the usual “magpie” is suitable), but also various types of paving slabs or stone.In the case of using the board, it is advisable to treat it on the underside with an antifungal agent and paint. It should also be remembered that it is better to lay the floorboard on the short side of the base - this will give the floor rigidity.

Roof
The roof in the gazebo can be of various shapes, but in order to prevent the structure from collapsing the first winter under the weight of a snowdrift, the roof needs to be made sloping - single or double. The domed roof, which is very popular among landscape designers and, indeed, giving the arbor a romantic and spectacular look, is a difficult task at home, so it is better to refuse this option.
A gable roof, in turn, is easier to design than a gable roof (in this case, it is not necessary to achieve high accuracy when performing a joint); True, this construction looks rustic.
Important! When using a soft roof (bitumen tile, rolled roofing material, polymer membranes), the roof will need to be completely sheathed with wood from the inside, while a hard roof (for example, corrugated board) does not require such precaution.
Before choosing the material for the roof, you need to determine how many wooden boards - large or small - it is planned to spend for these purposes. The simplest and most economical option for covering a summer house is a regular wave slate, the remains of which can often be found on a site simply lying idle. Having painted such a roof with ordinary acrylic paint (silicone, alkyd and polymer dyes are also suitable for the material), a quite worthy result can be obtained.
The manufacturing scheme for a more complex four-pitched roof looks like this:
Among the more expensive materials that are used to cover the roof, including the construction of arbors, it should be mentioned:
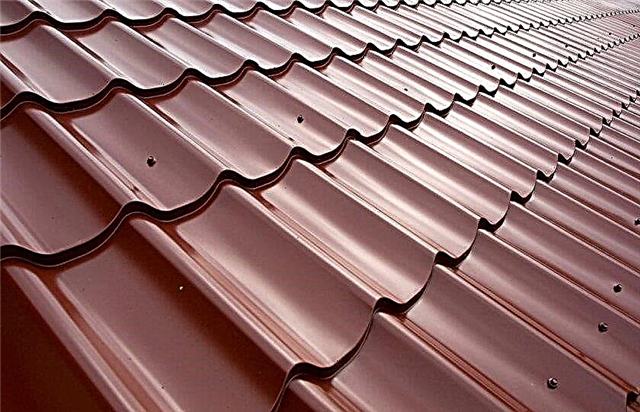
- metal tile;
- ondulin;
- polycarbonate;
- natural tile.
Did you know? True craftsmen in the construction of arbors are found not only among landscape designers or summer residents, but also in the animal world, or rather, birds. For example, in Australia and New Guinea there is a small bird the size of a sparrow called a hut (arbor bird), whose male attracts a partner by building a beautiful hut for her from twigs and twigs.
Each of these materials has its advantages and disadvantages, therefore, before making the final choice, all these nuances need to be studied:
- Metal tile durable, not very expensive, it weighs a little and is easy to assemble, but it makes a lot of noise during rain and is also subject to corrosion. About the same pros and cons has a corrugated board.

- Flexible tile - The material is beautiful, non-waste, durable and noiseless, but very expensive.

- Ondulin (or euro-slate) with obvious advantages (cheapness, lightness, flexibility, corrosion resistance) is not suitable for gazebos with barbecue, because it can ignite, and in addition, such a roof burns out over time.

If you have imagination and a willingness to deviate from tradition, you can use:
- straw;
- bamboo;
- reed or reed;
- wooden shingle (small overlapping boards);
- acrylic fabric (in this case, the "roof" for the winter must be removed).
Decoration and decoration
Decorating and decorating the gazebo is the final and most pleasant stage in the work. It is here that the finished building can be given a finished look in the style that was chosen during the design.
The simplest and at the same time constructive option in relation to the open summer pavilion is to abandon tablecloths, pillows, carpets and curtains, installing inside only the necessary furniture (table and chairs, or benches), and also providing electrical wiring for lighting.
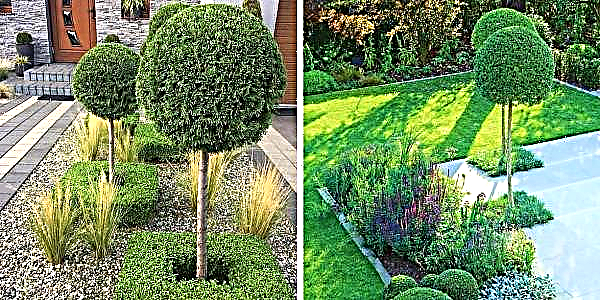
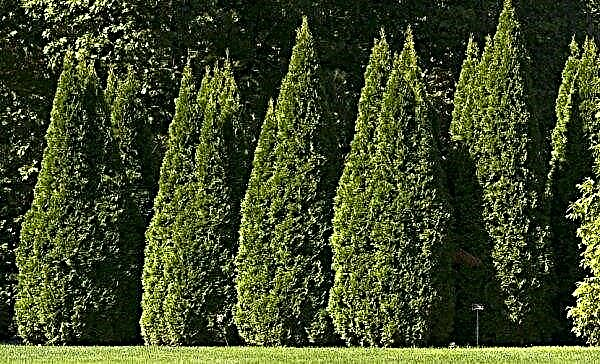
The best decoration for the gazebo will be living plants - dwarf conifers, weaving roses or annual flowers, decorative or field. Having planted such a carpet along the walls of the pavilion, running it on the walls or hanging a flowerpot with ampelous flowers on them, you can give the resting place a very picturesque and even sophisticated look, while the arbor will always remain neat and fresh.
 Wicker furniture is best suited for a gazebo, however, it stands today is not very cheap.
Even having spent so much pleasure, you need to be prepared for the fact that every time you leave the cottage (or even leave the house for the night), you will need to hide tables and chairs in a barn or other closed room, and this, of course, is not too much conveniently. Therefore, stationary wood furniture, deeply dug with legs in the ground and reinforced with a concrete base, seems to be a more constructive option.
The gazebo for the garden, especially built with your own hands and lovingly decorated in accordance with the taste preferences of the owners, has every chance of becoming a favorite place on the site. Such a building is equally well suited for a noisy picnic with barbecue in a large company, and for a quiet family evening with tea drinking in a close family circle. Do not deny yourself the pleasure, spend a little time, use your ingenuity, enlist the support of a pair of assistants, and trips to the cottage will no longer be associated with hard labor in the garden, turning into a real country vacation.


